Quickstart Tutorial
In this tutorial, we'll be showcasing a great use case for feature flags, guiding you through the creation of a simple React app, connecting it to DevCycle, and implementing an Ops feature flag to enable/disable a Maintenance Mode page.
You'll learn about some of the core features of DevCycle, while experiencing firsthand just how easy it is to implement feature flags to enhance your application's functionality and flexibility.
Step 1. Create a Feature
This guided onboarding to core DevCycle functionality assumes you already have an account. If not you can create one for free here. We offer an always free tier to start, with pricing that scales with usage as needed.
On the DevCycle Dashboard, access the "Feature Management" page via the Features button on the top navbar. Click the blue + Create New Feature button (or select the "+" button in the main navbar) to begin the Feature creation process.
To create a Feature:
- Click either the "+" button or the "Create new Feature" button.
- Choose an
Ops Featurefrom the options modal. To read more about the Feature types and their uses, see DevCycle Feature Types. - After choosing a type, name and describe your Feature:
- Feature name: For our example, this will be
Maintenance Mode. - Feature key: This key is how the Feature and its Variables will be referenced in code. (A key of
maintenance-modewill be automatically suggested based on the entered name.) - Initial Variable Key: Define an initial Variable key that can differ from the new Feature key name. The Feature Key and the Initial Variable Key will mimic the input entered in the Feature Name field formatted in kebab case (e.g.,
maintenance-mode). - Initial Variable Type: Select
Booleanfor this example.
- Feature name: For our example, this will be
- Click "Create".
Congratulations! You have now created the Maintenance Mode Ops Feature within your project.
Step 2. Create a New React App
In your terminal, run the following commands to spin up a new React app.
npx create-react-app my-app
cd my-app
npm start
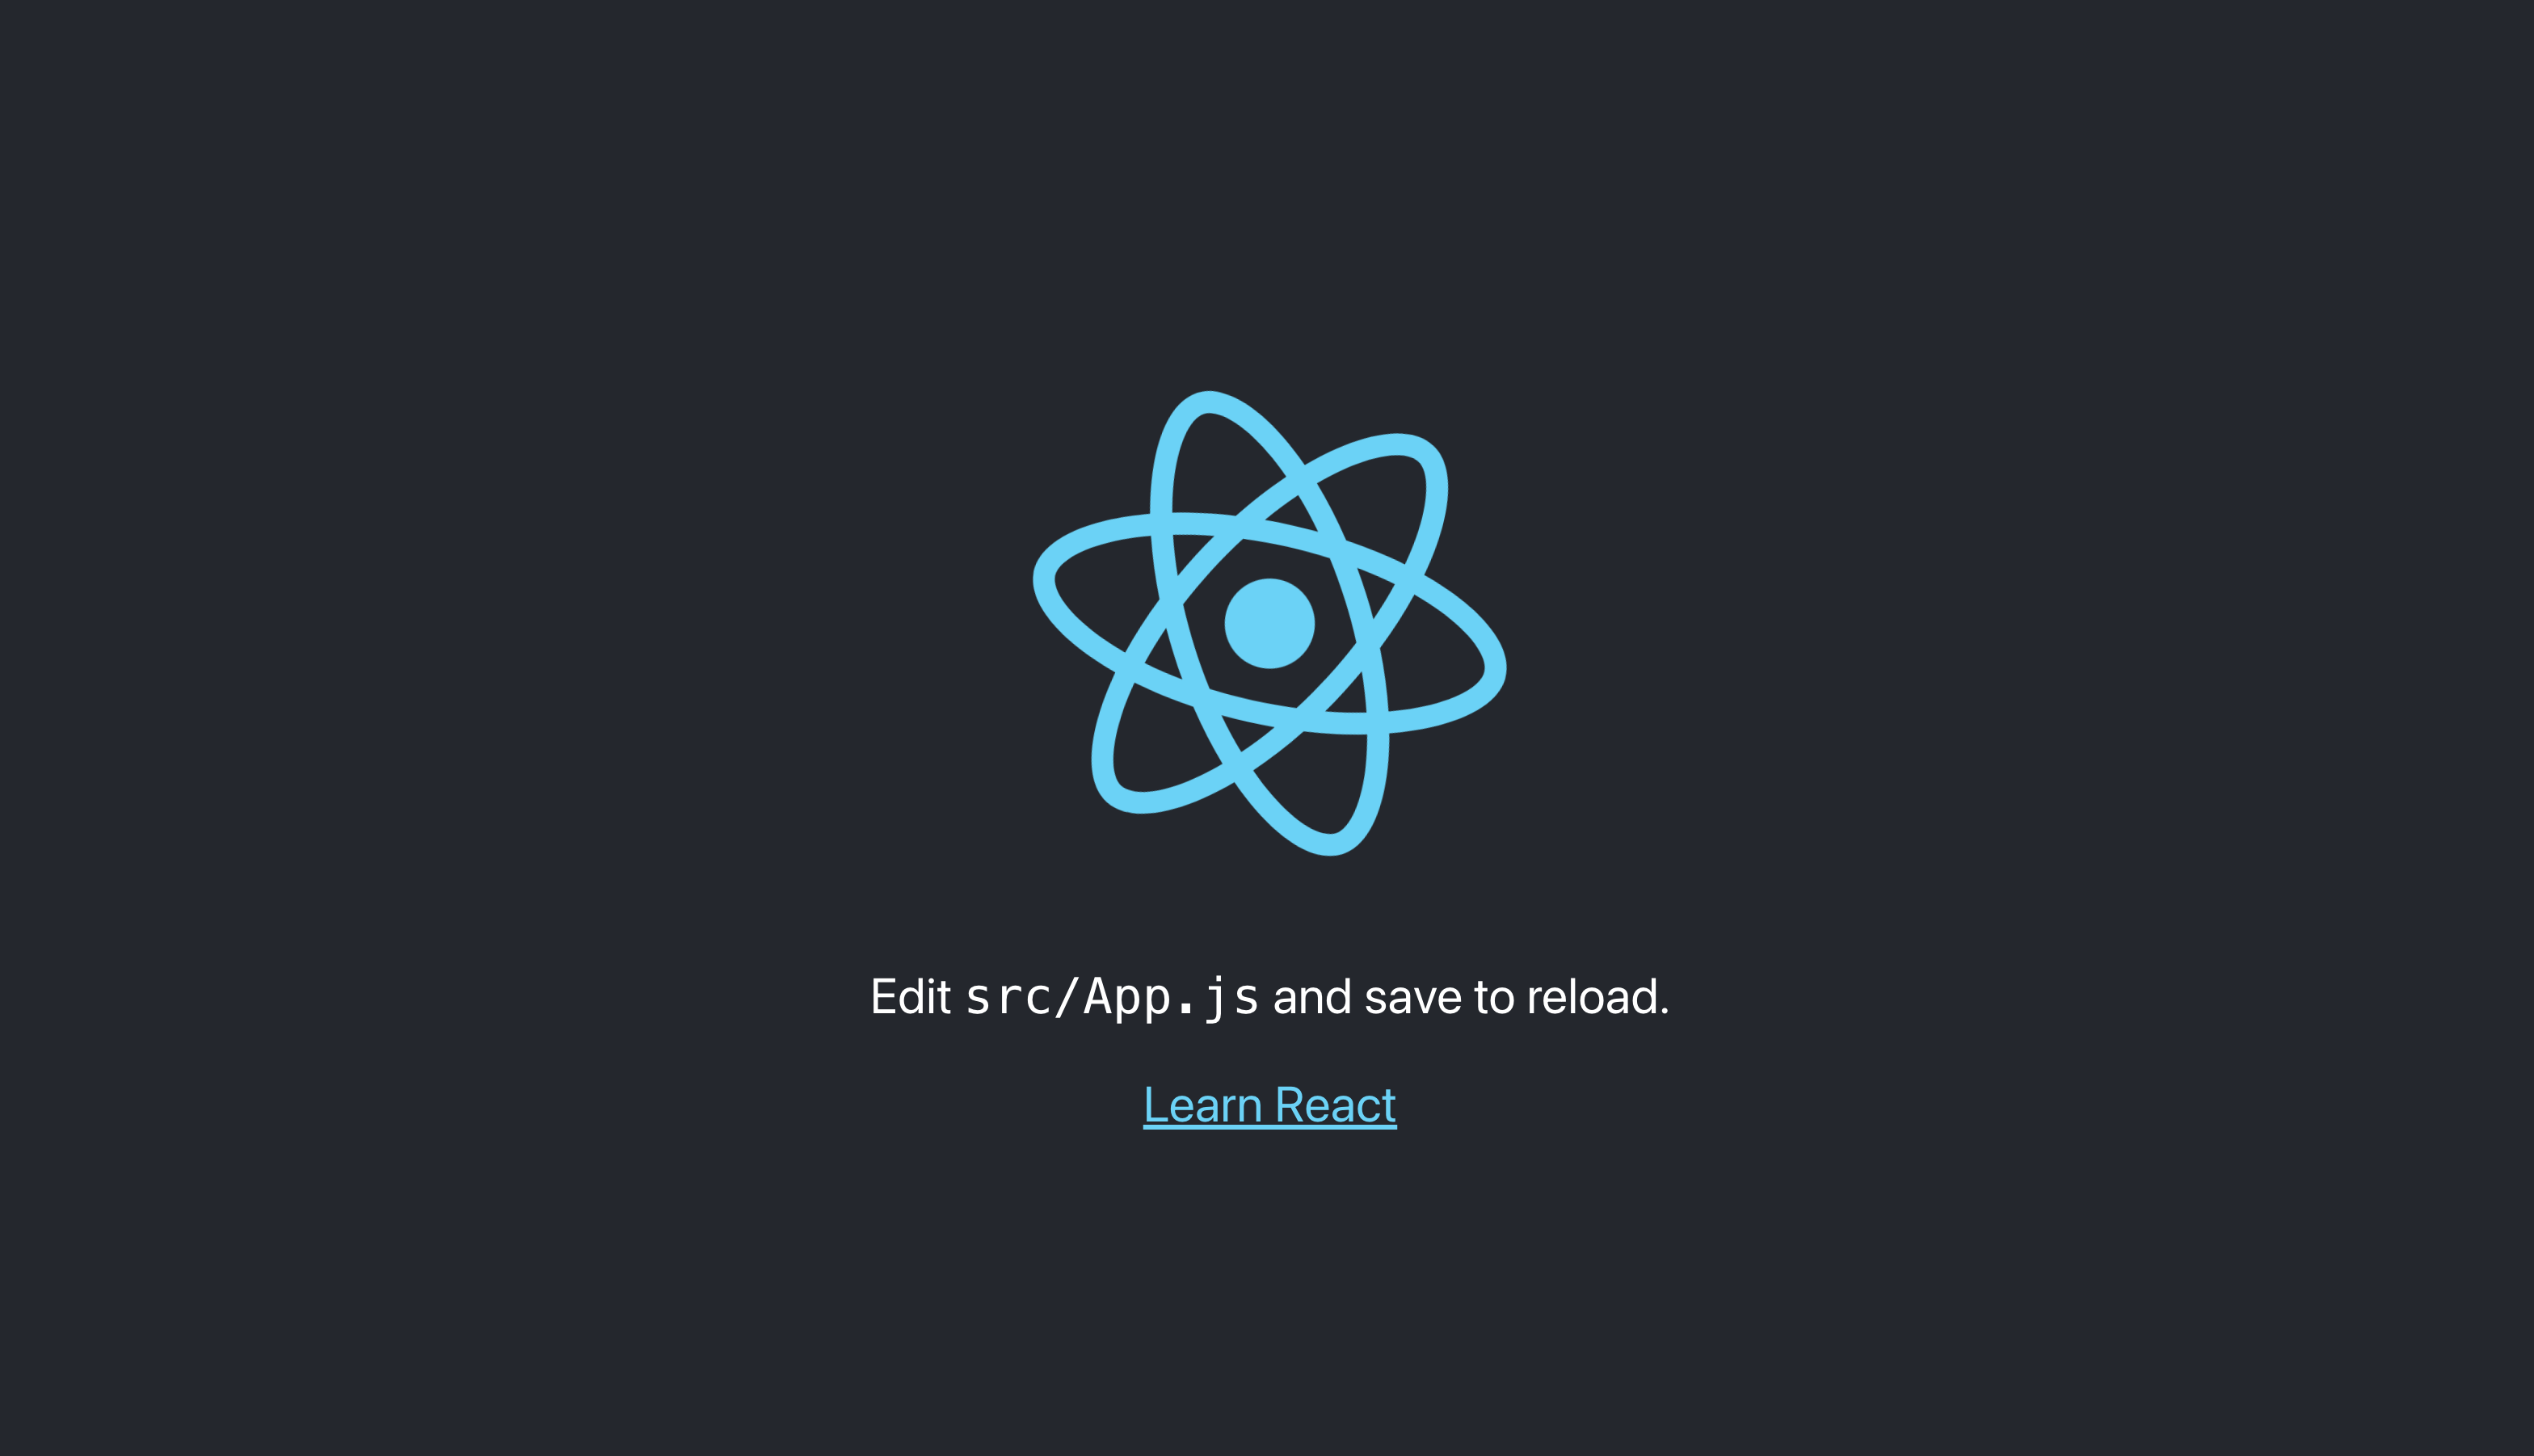
If successful, you should see the following in your terminal:

And if you visit localhost:3000, you should see the default React app page:
Step 3. Implement the DevCycle SDK
With a Maintenance Mode Feature created over on the DevCycle platform, its time to install the SDK and implement the actual maintenance mode logic in the React application:
1. Install the DevCycle SDK via the relevant dependency manager.
For this example, the React SDK is installed via npm:
npm i @devcycle/react-client-sdk
or via yarn:
yarn add @devcycle/react-client-sdk
2. Import DevCycle.
To import DevCycle, head over to App.js and add the following to the import statements at the top of the file:
import { withDevCycleProvider } from "@devcycle/react-client-sdk";
3. Obtain SDK Key.
In order to initialize DevCycle in your application, you'll need to obtain the relevant SDK key from the DevCycle Dashboard, which in our case (a React application) will be the Client key for the Development Environment.
To obtain the SDK key, you'll need to:
- Navigate to your DevCycle Dashboard.
- Click on the View SDK Keys (i.e., Key Icon) in the top navbar.
- Copy the Client Key from the Development environment.
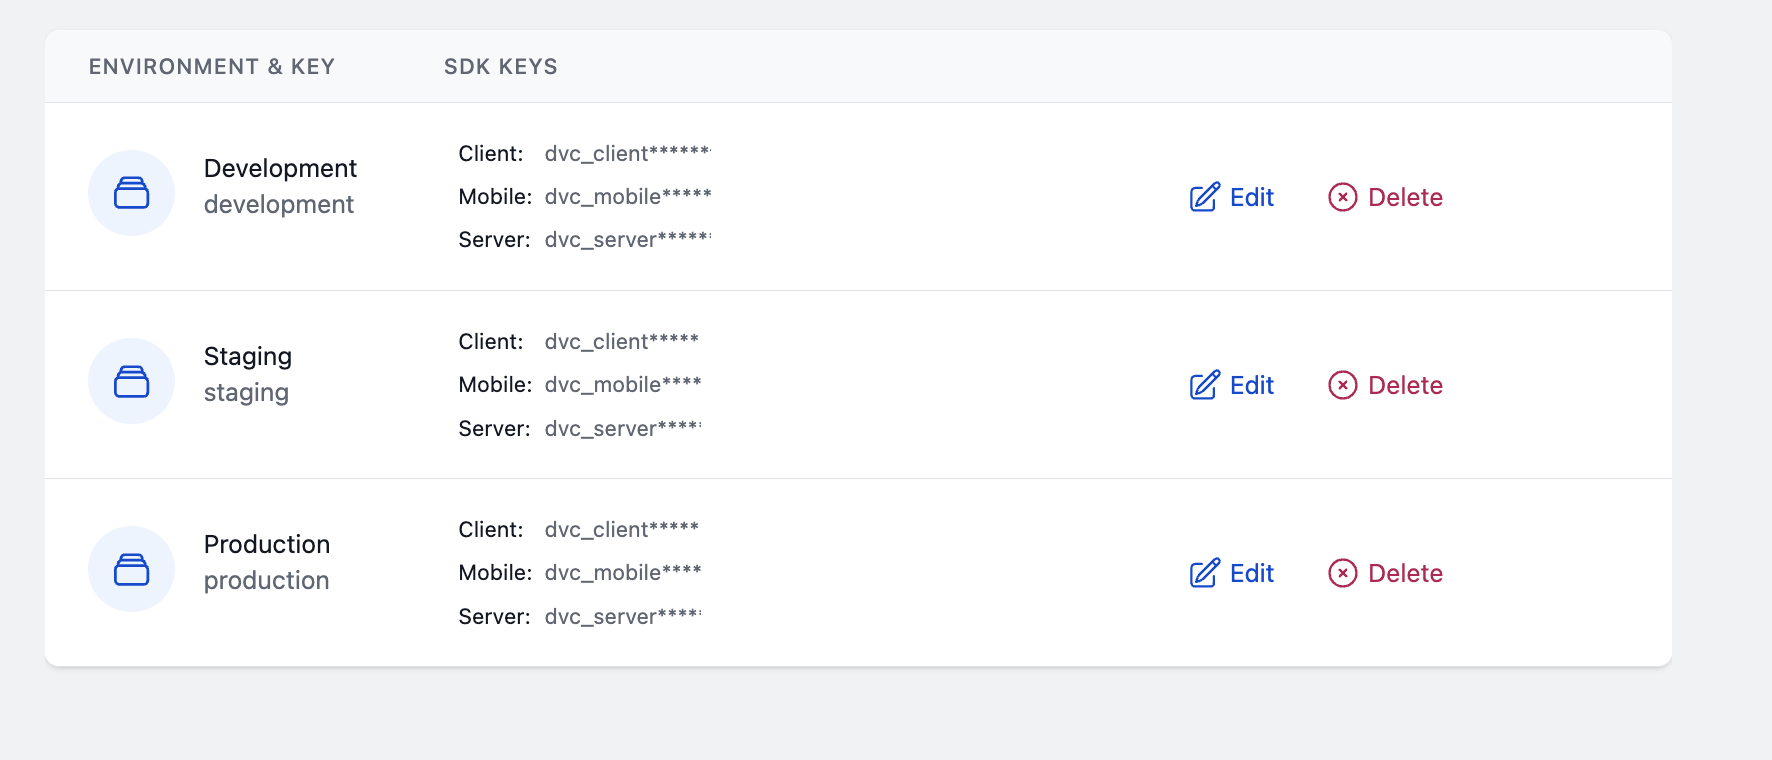
Depending on which type of SDK and which environment you are initializing for, the SDK Key will be different. Read more about Environments and keys in the essentials.
4. Initialize DevCycle Provider
Next wrap your App component with the withDevCycleProvider higher order component to allow DevCycle to be used throughout your React app:
export default withDevCycleProvider({
  sdkKey: "dvc_client_********_fff1111",
})(App);
5. Access your Variable.
Implement the code to evaluate the Variable that is being controlled by the Feature you just created. Read more about Variables here.
To access the variable, you'll first need to import the useVariableValue hook at the top of App.js
import { useVariableValue } from "@devcycle/react-client-sdk";
Next you will use the useVariableValue hook to access the Maintenance Mode variable you created earlier. Create a new maintenanceMode constant inside your App() function which calls useVariableValue with two parameters: the maintenance-mode key and then a default value for this flag, which in your case will be false:
function App() {
const maintenanceMode = useVariableValue("maintenance-mode", false);
// Additional hooks and logic
}
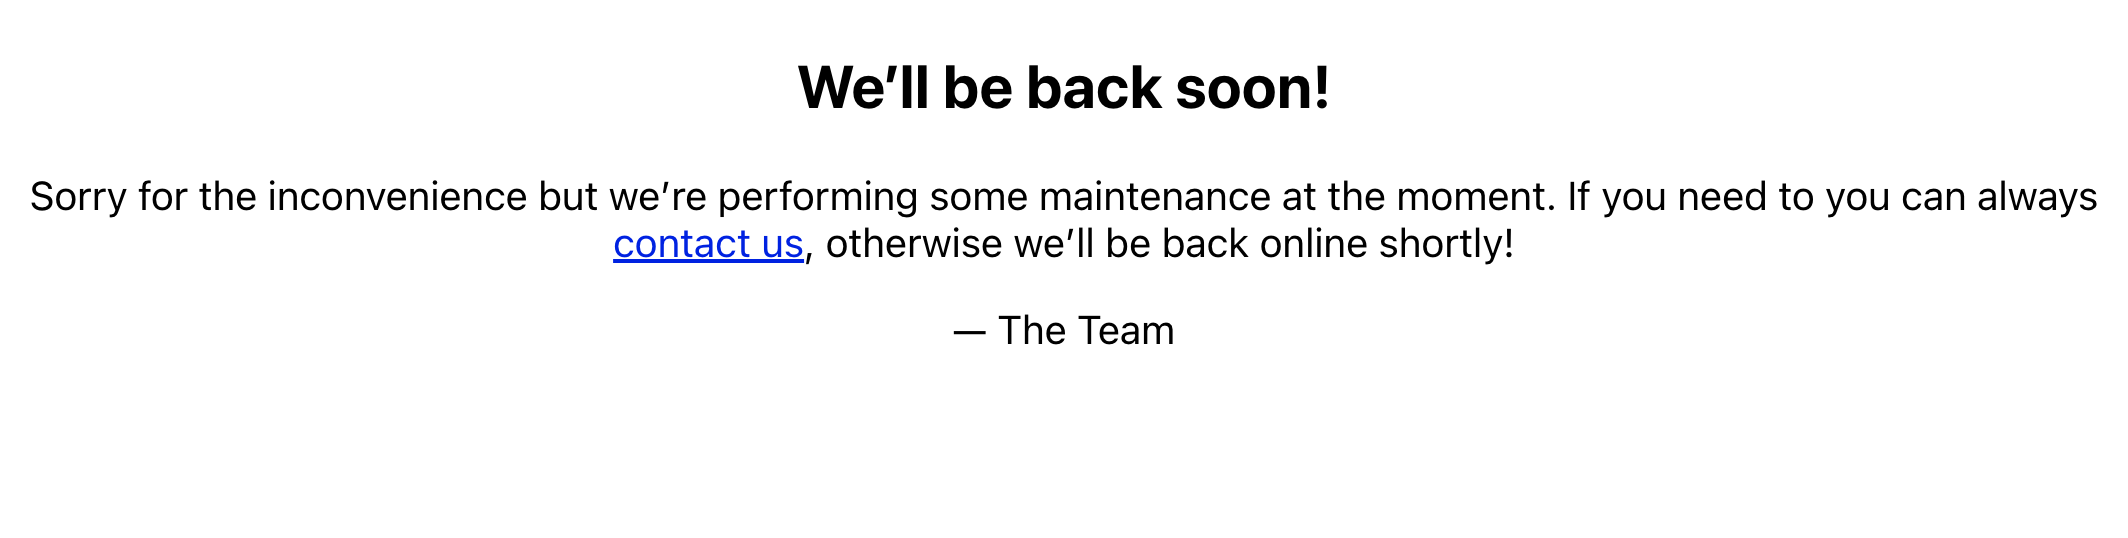
6. Add Maintenance Mode Page and Set evaluation logic Finally, you will add logic to conditionally render either the maintenance page or the default app content based on the variable's value.
Here is the full code implementing that logic:
function App() {
const maintenanceMode = useVariableValue("maintenance-mode", false);
if (maintenanceMode) {
return (
<div className="App">
<article>
<h1>We’ll be back soon!</h1>
<div>
<p>
Sorry for the inconvenience but we’re performing some
maintenance at the moment. If you need to you can always{" "}
<a href="mailto:#">contact us</a>, otherwise we’ll be back
online shortly!
</p>
<p>— The Team</p>
</div>
</article>
</div>
);
}
return (
<div className="App">
<header className="App-header">
<img src={logo} className="App-logo" alt="logo" />
<p>
Edit <code>src/App.js</code> and save to reload.
</p>
<a
className="App-link"
href="https://reactjs.org"
target="_blank"
rel="noopener noreferrer"
>
Learn React
</a>
</header>
</div>
);
}
Step 4. Modify Targeting
Variables deliver different values to different users via Targeting Rules. During the creation process for our "Maintenance Mode" feature, some initial Targeting Rules were set up to serve Configuration 1 or true for your personal email address in the development environment.
In this example, we haven't set any User Properties to target, so we'll update these targeting rules to impact All Users, which is generally how you would want to use Maintenance Mode.
To update these targetting rules, you'll need to:
- Navigate to the Maintenance Mode Feature on your DevCycle Dashboard.
- Under your Development Environment targeting rules, locate the definition that references
User Email. - Change this rule to target
All Users. - Click
Save.
If everything is working, your maintenance mode should now be enabled, and you will see the maintenance mode screen.
For more information on targeting based on user data, see the documentation on Custom Properties here.
Step 5. Toggle Variations
The final step is to toggle between different Variations.
- Revisit the
All Usersrule you just updated. - Change the variation from
Configuration 1toConfiguration 2. - Click save.
If everything is working, your maintenance mode should now be disabled, and you will see the normal app screen.
You've just set up and toggled a maintenance mode feature flag running in your own React app using DevCycle.